About Me

Living off the land (as much as possible) in a Los Angeles suburb

Monday, May 31, 2010

The Pluses and Minuses of Cardboard Mulch

Here is the first flower of all the cucumber seedlings.  Its on the seedling planted directly in the ground on the north side of the driveway in the cardboard mulch area.  So cardboard mulch isn't all bad. (more on that below).

I'm really liking this driveway garden set up. It started as a temporary solution while the backyard was under construction and not plantable.  But I'm really enjoying having so many veggies on the driveway, which is right outside my side door, which is right beside the kitchen. Besides the plants, I also have the compost bins right there near the door which makes it super convenient to throw kitchen scraps in, and also to keep it turned and watered.  Everything is very compact and convenient and two steps out the door.  Who would have thought the two narrow strips of dirt between the driveway and the house on one side and the driveway and the wall which divides mine and the neighbor's property on the other side would make such a great vegetable garden?

Although sometimes I give advice on all sorts of gardening issues (ie, don't get water on the leaves, or cardboard is great for mulch) actually almost everything I am doing is experimentation and so I'm not always 100 percent right (although my super-ego totally disagrees).  This blog is a note-taking tool: a garden diary which I can use to record what I do and I can learn what I should do again next year, and what I should not.

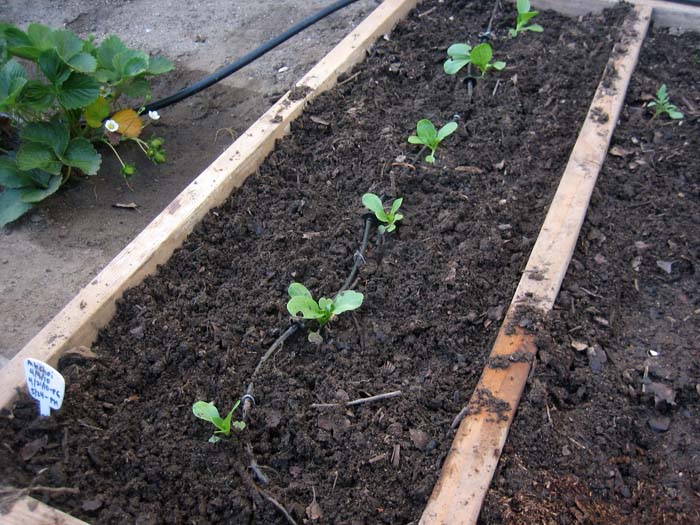
So here are two things I learned recently. 1. As good as the cardboard mulching is to keep the weeds down I am finding it is also a perfect hiding and breeding place for earwigs once it gets soggy from watering. And slugs. So I'd say on a scale of 1 - 10 cardboard as mulch might only be a 5.

2. I have said it's not good to get water on the leaves of tomato and other plants and that it's better to water at the ground level, with a drip system or flooding. While that is generally true, actually it's ok to get the leaves wet occasionally - just not soaking wet all the time. In fact every once in a while I use the hose to spray water over all my plants and trees to wash off all the pollution and grime we have floating around over LA. And actually for the first two years of my backyard vegetable garden I used a sprinkler attached to a garden hose all the time to water the veggies. I did have lots of powdery mildew or fungus caused by so much water sitting on the leaves of the yellow summer squash, but for 90 percent of the crops there weren't negative repercussions from overhead watering.

And there are my mea culpas. On the "Here are my great ideas" side, one which is actually great is this: When you are planting your seeds take the time to write not only the type of plant on a plastic labeling stake, but also write the date planted, date to germination and date to maturity.
I abbreviate these as P, PG and PM so there is enough space to get all the info on there. It's great to see how you are doing compared to the expected rate so if you know things are going well or not. The bok choi came in right on schedule :-)

Friday, May 28, 2010

Amaranth

I don't think that many people are familiar with amaranth so a brief explanation, courtesy of ehow and some other online sources...  

Amaranth is an ancient plant which produces edible leaves and grain.  It is native to the Americas and was an essential crop of the Aztecs.  The Aztecs and others use them for the grain but in Asia, and in the West among "whole food" fans, amaranth leaves are a perfect substitute for greens like lettuce or spinach.  You can stir fry them like spinach (Asian style) or eat them raw as a salad (I haven't tried that but it's referenced a lot if you do a Google search).

Amaranth is amazingly hardy in our climate.  Little problem from pests or super hot temps.  Last summer a friend gave me one small plant, a seedling about 4 inches which I transplanted it into the backyard garden and it grew to six feet tall.  I ate the leaves and tried to harvest the high protein tiny black grain but never had the patience or technique required to do that.

Amaranth is so hardy that is reseeded itself in my garden and now I have about ten plants like this one.  I've transplanted one to the driveway garden but still have a bunch - if anyone wants some they up for grabs. A great thing to grow because it is so easy and you will never have to buy greens at the market again until about October.

And they look great too.  They are a very attractive deep maroon and green color.  Looks and substance - a great combination :-)

And to end off here is a snap of some of the basil seedlings - growing pretty slowly but looking very healthy

Wednesday, May 26, 2010

First Radish

Back in LA after being out of town for eight days and happy to say the plants are in reasonably good shape.  I was able to pick and eat the first of the vegetable crops today - a single radish.  Illustrated here from as many angles as possible :-))  It was pretty peppery and had a good size and a good taste but was a little light (dry) for it's size, probably due to the fact that I let it get dried out a few times.  I guess you have to plant a lot more than six radish plants if you want much of a usable yield.  


Other than that the seedlings are doing very well as you can see in the photo above at right.  I'm giving away any and all of these plants so if you are local and want one or more let me know...


And by the way, if you click on any photo it will enlarge to full screen size...

Monday, May 17, 2010

Pest and Bugs

For a long time now I've wanted to document and catalog all the pests I find in the garden so I can discover the best organic way to control them. I have a decent illustrated book called “Good Bug, Bad Bug” but the number of insects it has is very limited and besides I don’t have it with me right now. For the time being I just wanted to post some photos of bugs I encountered yesterday. The big black beetle is not from my garden but from the foothills near the house where I hike.


I have no idea what kind of bugs are in the strawberry (there’s two in the photo but maybe hard to see). On the kale leaf is the green caterpillar that does lots of damage but which I rarely see because they work at night I believe. The brown thing must be a slug because it was in a dark corner under some damp wood. I like how it is sitting on the bed or pink/brown leaves – almost like a nude on a bed covered with red rose petals
no bugs here, just some green onions.......

Saturday, May 15, 2010

Handsome Pak Choi and Three Things (Illustrated) about Tomatoes

Everything is growing well right now. I cut back on the water and things are looking much better. At left is the handsome pak choi. It’s the first time I’ve grown it and it seems like a super easy one to do.  If you are starting a garden for the first time consider planting some pak choi and be pleasantly surprised by how well it grows.

The biggest problem I am seeing with pak choi (which is also called Chinese cabbage although it is more like spinach or chard than our hard cabbage) is that some type of pest has been eating the edges of the leaves. I have yet to find a bug on the plant so I don’t really know what it is. It might be caterpillars or earwigs (ugly!) as I’ve seen lots of them around. What ever is eating them I’m sure is doing it at night. I’m sure if I go out there with a flashlight a few times I will find out who the culprits are.

On the subject of culprits and agricultural evil-doers, check out this tomato seedling. I noticed it was wobbly and pulled it out and found most of the roots missing. I think it might be the handiwork of the white grub (the larvae of Japanese Beatles). I have lots of these nasty fat white worms that live below soil level. Then when they turn into Japanese Beatles they eat the figs :-(  Here’s a photo I copied from an ag site on the internet – next time I see a white grub here I will get my camera. Also next time photos of other scary creatures such as earwigs.


Also with tomatoes – stake them early, before they get unruly. Unruly = lots of rotting fruit and leaves hidden under the plant = lots of bugs and disease. I have been reusing these inverted pyramid wire cones (photo right) for a couple of years now and they work pretty well, although sometimes need reinforcement with wooden stakes.
Last thing about tomatoes – the three scraggily seedlings I planted about a week ago in the narrow strip along the driveway beside the sugar cane (photos left and below) are super robust now. They definitely came back from the edge of the abyss.

Wednesday, May 12, 2010

Tomato Plant Disease

Tomato plants can fall victim to a large variety of diseases.  One of the most common is Early Blight.  The leaves turn yellow and become mottled with brown or black, target-like spots.

It is caused by a fungus and it is aggravated by water on the leaves and/or damp soil (poor draining).  It attacks the lowest leaves first and can spread and kill the plant if ignored.

I'm using an allegedly organic fungicide that I bought at Armstrong Nursery.  Mother Jones suggests simply removing the infected leaves at the very first sign of disease, which I have also done. (Like the leaves in this photo - long gone - actually left them at Armstrong when I went in for the diagnosis) So far so good.

I'm not sure if I have Early Blight or Gray Leaf Spot, a disease which is caused by a different fungus but has very similar symptoms and can be treated in pretty much the same way.  I don't really see the "concentric, target-like circles" of Early Bight so think its probably Gray Leaf Spot.

I thought I'd share this because it's a very common problem.  If you see it immediately removed the infected leaves, let the soil dry out if it is damp, don't let water fall on leaves when you water - water from below.  And treat with a fungicide.

By the way Early Blight is different than Late Blight, which is the disease that caused the Irish Potato Famine (and attacks tomatoes as well as potatoes).

Here's a photo of something going on with the zucchini leaves.  Also some kind of fungus.  I removed the leaves and sprayed with the fungicide and that seems to be doing better too.

Lots of problems I have been having I believe have been caused by too much water.  I've let the soils dry out a bit and everything is looking better.

To end on a more upbeat note, here's a photo of the strawberries, which was taken a couple of days before I laid the sugar cane straw as a mulch/ground cover.  The perfect shape and color, not to mention smell, texture and taste of the strawberries never ceases to amaze me...

Tuesday, May 11, 2010

Say Hello To My Little Friend

Yewwwww!  It's that time of the year again: black widow spiders everywhere...

Monday, May 10, 2010

Odds and Ends

This is a three photo combo of the seedling, youth (?) and adult stage of one type of palm tree that is commonly seen around LA.  I really like the fan-like spread of the leaves on the young one in the middle photo.

It's surprising how easily they seed all over the place - you could almost say they are invasive.  I'm pretty sure the one in the middle photo, which is beside the back door, just planted itself there. Clearly, considering how big they get (photo at right, which is the view from the back of the house looking west) it has to be destroyed.  A sad casualty to be of the upcoming backyard demolition.

I just did a Google search to find the name of this type of palm.  It's a California Fan Palm (Washingtonia filifera).  While searching I landed on a website called sunpalmtrees.com where they are selling five foot tall California Fan Palm trees for $400!!!!

Anyone want a Washingtonia filifera???

Sunday, May 09, 2010

Recycling Sugar Cane into Mulch

I've run out of cardboard to use as a mulch/weed barrier so I looked around the driveway and garage and found some other materials to use.  One is the dried, straw-like tops of the sugar cane I cut down about a month ago.  I stripped the dried leaves off the cane and then crunched them up and laid it around the strawberries and the chives as you see in the photo.  If I had that chipper/shredder I've been lusting after I could have shredded down into a nice fluffy mulch, but this will do for the time being.

I am using the thick part of the cut sugar cane to make frames for some of the small seedlings I planted on the parkway so hopefully people won't step on them.  I also plan to make them into stakes and maybe even tomato cages.  This way I will have reused the entire cut sugar cane.

The other thing I am trying out as a weed barrier is the thick rolled paper which is normally used to protect the floor inside the house when painting or doing other work.  I put it around the kumquat bush (at left in the photo) and the little bay leaf tree (at right) and the two tiny long bean seedlings (far right).

At the local park the landscape guy there gave me free wood chips - an entire pickup truck full.  I used some of it around the vegetable seedlings I planted in the front but I see lots of those rolly-polly bugs in there and it looks like they are aiming at eating the seedlings.  Next time I will use only store-bought wood chips around the vegetable plants and use the free stuff from the park around the non-edible landscaping.


Ah well, you can see the sugar cane straw better here.  I just couldn't resist using the photo with the dogs in it at top...

Thursday, May 06, 2010

New York Times article today about weeds and herbicides

http://roomfordebate.blogs.nytimes.com/2010/05/06/invasion-of-the-superweeds/?hp

Controlling Weeds With Cardboard

A colleague was telling me the other day about the uncontrollable weeds in his backyard which are ruining his enjoyment of his large outdoor space. He said he has been resorting to Round-Up, a chemical weed killer, and that he and his wife were so frustrated by the "Weeds Gone Wild" problem that they were planning to pave the entire backyard. Sacrilege!

He was very surprised when I told him it is possible to control weeds without chemicals, by mulching.

Mulch is any type of material that is spread or laid over the surface of the soil as a covering. It is used to retain moisture in the soil, suppress weeds and keep the soil cool. Organic mulches include bark, shredded or chipped, compost, manure, grass clippings, newspaper, cardboard, shredded leaves and straw.

I've been using cardboard as mulch for a while now and it's been working out great for me.  After speaking with my colleague I remembered I still had some seedlings that I needed to get into the ground, so I turned the soil, laid some cardboard, cut holes for the seedlings and did some planting.  Here are some photos of what it looks like right now.


The cardboard has many advantages. It's cheap, easily available and gives a complete coverage. (In my photos you can see I still need to cover up the corners that are exposed). You can cover it with a more attractive mulch like wood shavings or straw and the water will seep right through the cardboard to the plants, but since no light hits the weeds they die. I have picked up cardboard after having it down for a couple of months and it is pretty cool to see how total the destruction of the weeds is.

If you try cardboard as mulch use only plain cardboard, not the smooth, colored type that a vacuum cleaner or toaster oven might come in. You don't want the ink leaching into the soil.

Tomorrow I will talk about planting on the parkway. Here's a photo of the parkway in front of my house, which you can see is challenging because it is heavily shaded.


Monday, May 03, 2010

Transplants

Kidney, heart, lung, you know, the regular. (Kidney beans, artichoke hearts…um can’t thing of anything for lungs… mung beans is the best I have ;-)

I've probably been watching too much Nurse Jackie and obsessing on hospital stuff.

To the garden at hand though I figured out why these things were growing so slowly in the little pots.  I planted them over A MONTH AGO, which means they should have been transplanted into the ground or big pots a while back.  I didn’t realize how much time had passed until I checked back to the first blog post, which was the end of March.

Yesterday I did a ton of transplanting – I transplanted many of the rouge tomato seedlings that were scattered all over the Side Door Garden (SDG).  Put them into different sized pots I had been saving from all the purchases of seedlings I have made from Home Depot etc over the last couple of years.

I moved all sorts of seedlings around – moved and replanted in the SDG some basil seedlings which where too close to other basil seedling, planted stuff (carrots, snow peas, radishes) from the peat Jiffy pots into the ground – some in the SDG and some just right into the front yard.  Moved the cilantro seedlings into pots.

I always though transplanting seedlings was a delicate surgery and that if not done exactly right would often end up killing the plant but, based on what I see 24 hours later, 99 percent of the seedlings that were moved are doing perfectly well.

Moral of the story is don’t hesitate to transplant if/when you need/want to.


Things I learned during the transplanting yesterday, besides that there is no need to waste time obsessing over exactly how you do a transplant:


Need a big bag of wooden popsicle stick or tongue depressors to use as plant ID sticks in the pots, because the plastic ones from the garden store are too expensive when you need hundreds of them.

Need to complete ASAP the drip irrigation for the SDG – I’ve only got three of the six rows on.  Also I think the soaker drip would be much better than the inline drip for this kind of planting layout

Need to turn and prepare whatever remaining dirt I have along the driveway ASAP and in the front yard too for vegetable planting because I have lots of seedlings waiting to go into the ground

Need to buy or build something for the snow peas, zucchini and long beans to trellis up along.

Need to find out/figure out what kind of mulch is the best when the seedlings are so small.  I’m using redwood shavings/chips on the bigger plants (and it’s great but expensive), but I need to put something down around the little seedlings to help keep weeds down and to conserve the moisture in the soil.  To be perfectly honest I’ve been having really good luck with cardboard as a weed barrier.  Not the most attractive solution though.

Mulch is one of those holy grail things, like irrigation, or camera bags for those in the business – always trying to find the perfect one, buying and trying out every type but never finding one that is perfect.

And the final thing I learned is that I have a lot of things that need to be done ASAP ;-)